
Leave Management
The Leave Module is used to manage and control employee leave processes within the school. It allows administrators to configure leave policies, define approval workflows, and monitor leave applications in a structured and transparent manner.
Using this module, schools can:
-
Configure different types of leaves as per state or school policies
-
Set up approval chains to define how leave requests are reviewed
-
Manage school-specific holidays and view state-declared holidays
-
Approve, reject, or delegate employee leave requests
-
Track employee leave history and automatically calculate leave balances
1.Top Navigation Tabs
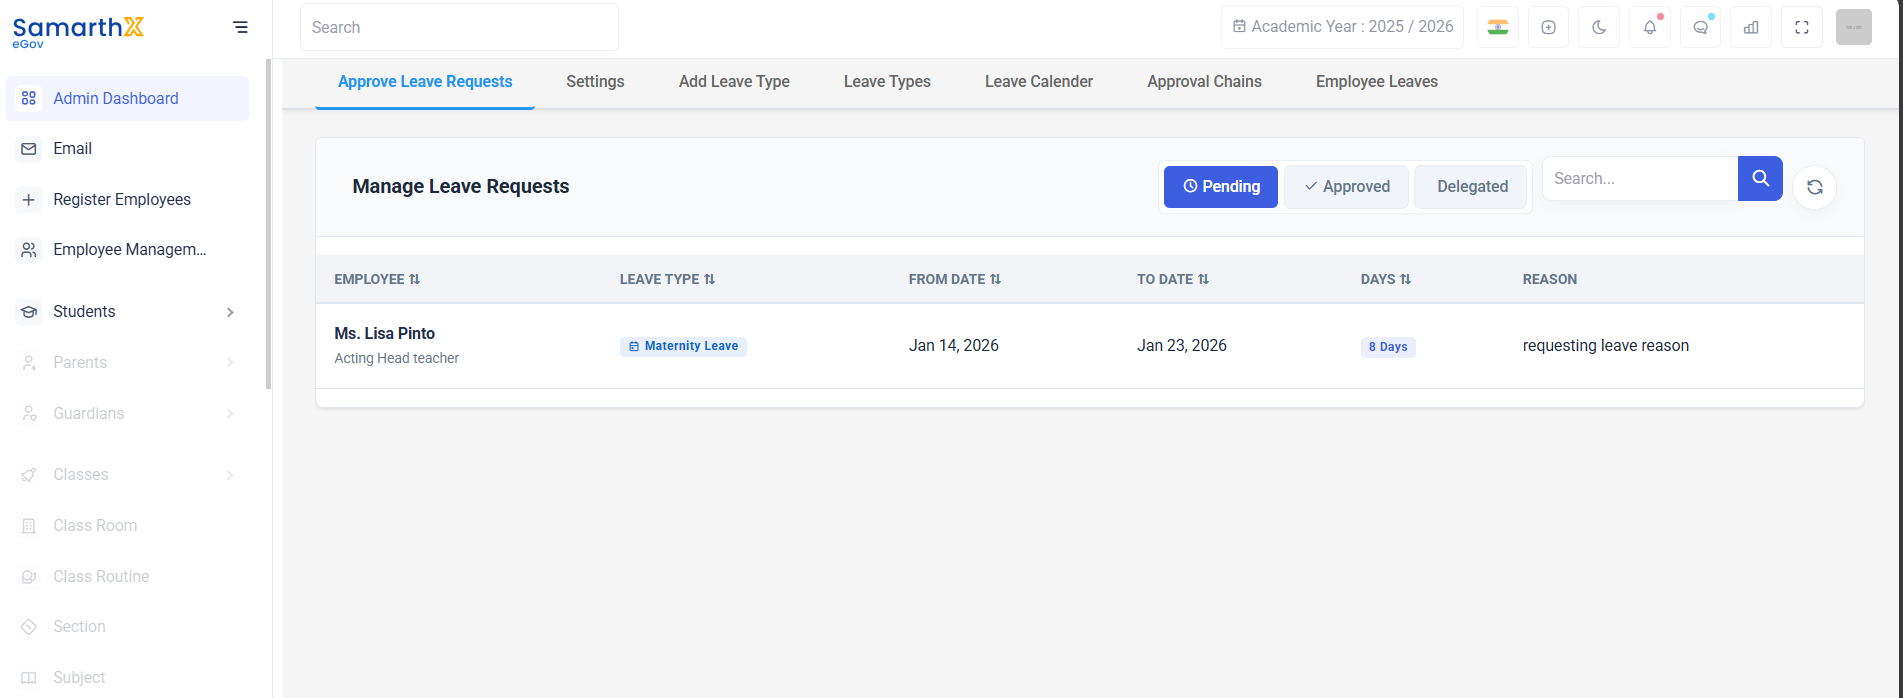
1.1 Approve Leave Requests
1.2 Settings
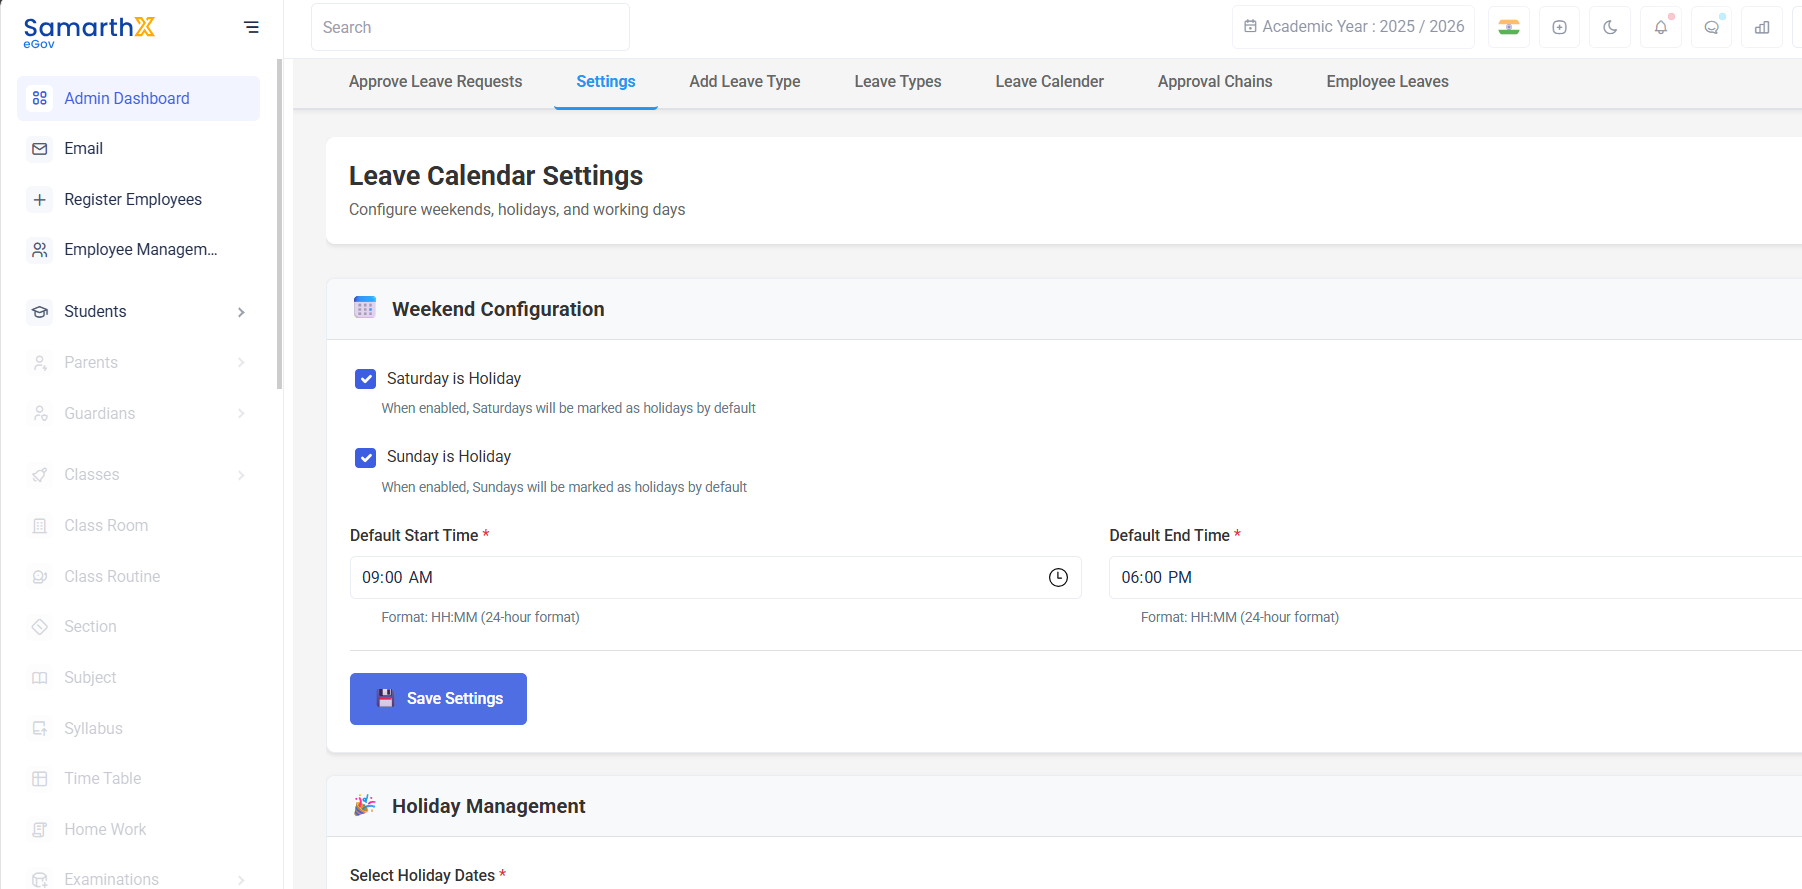
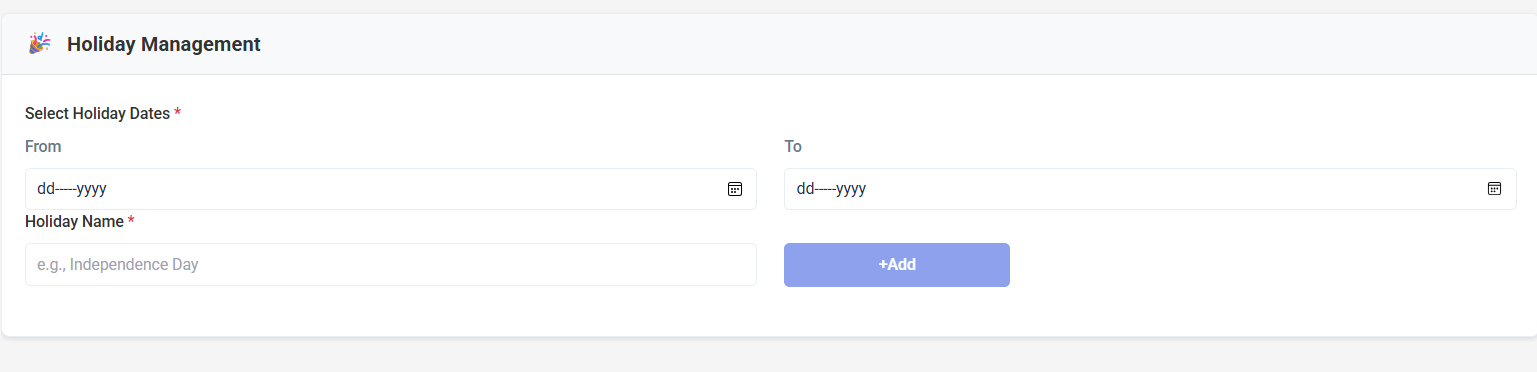
Allows schools to configure school‑specific settings, such as:
-
School holidays
-
Weekend rules (if applicable)
1.3 Add Leave Type
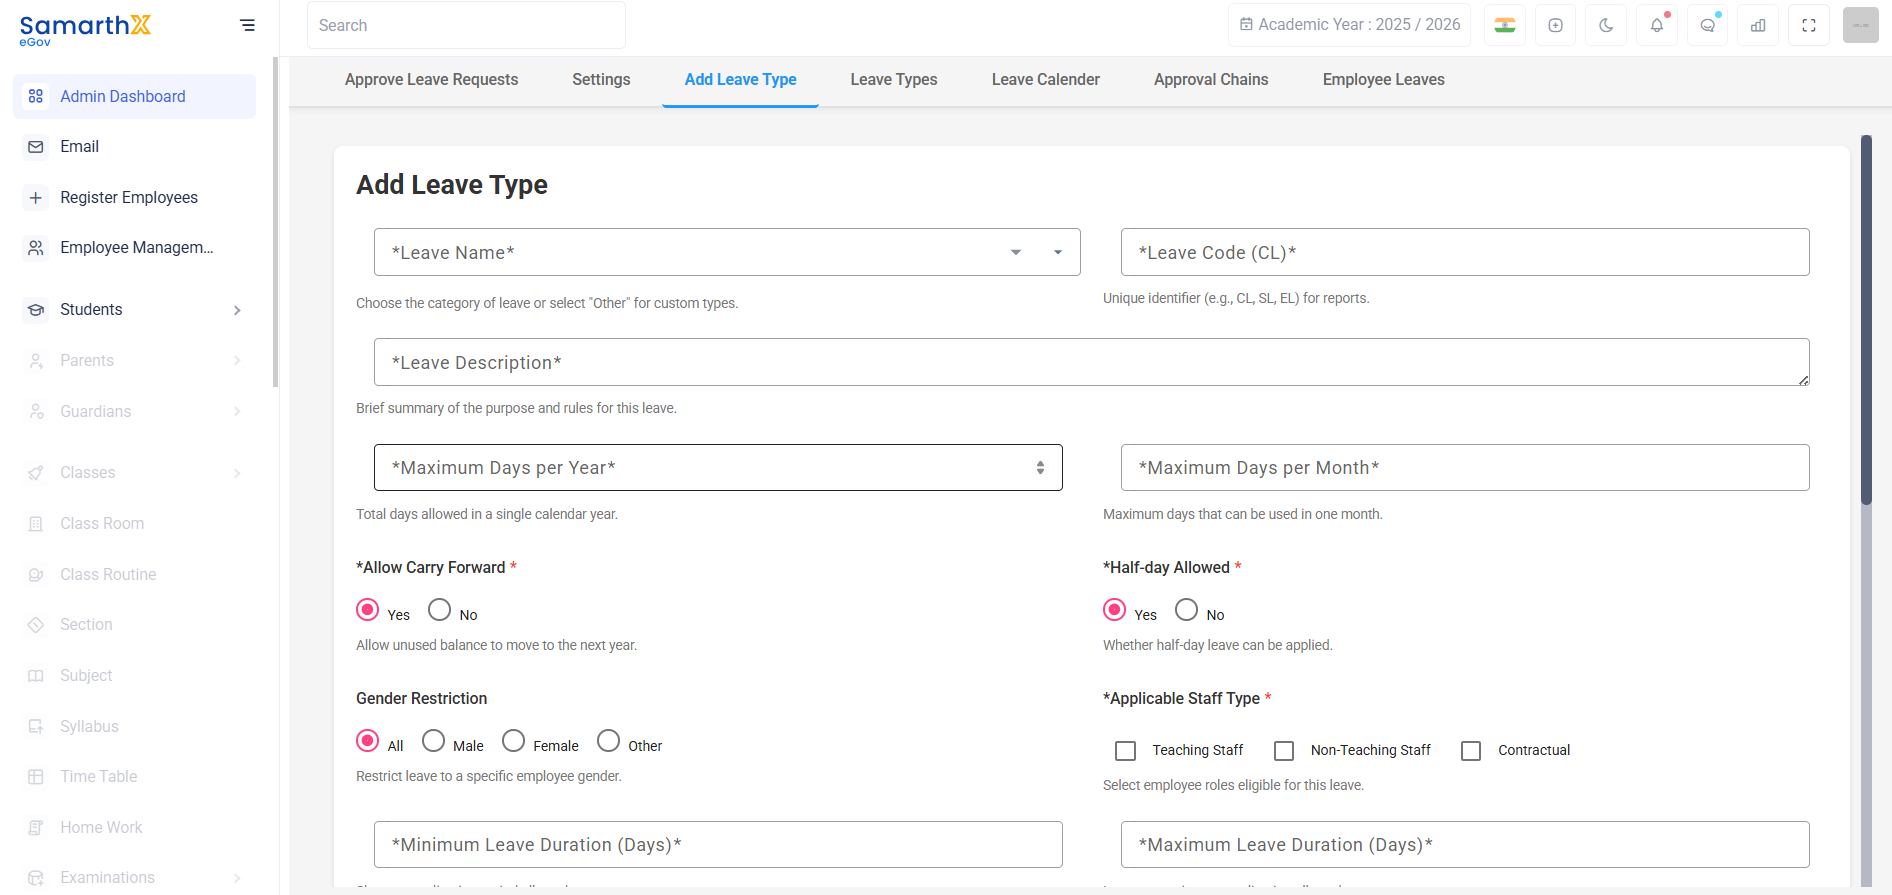
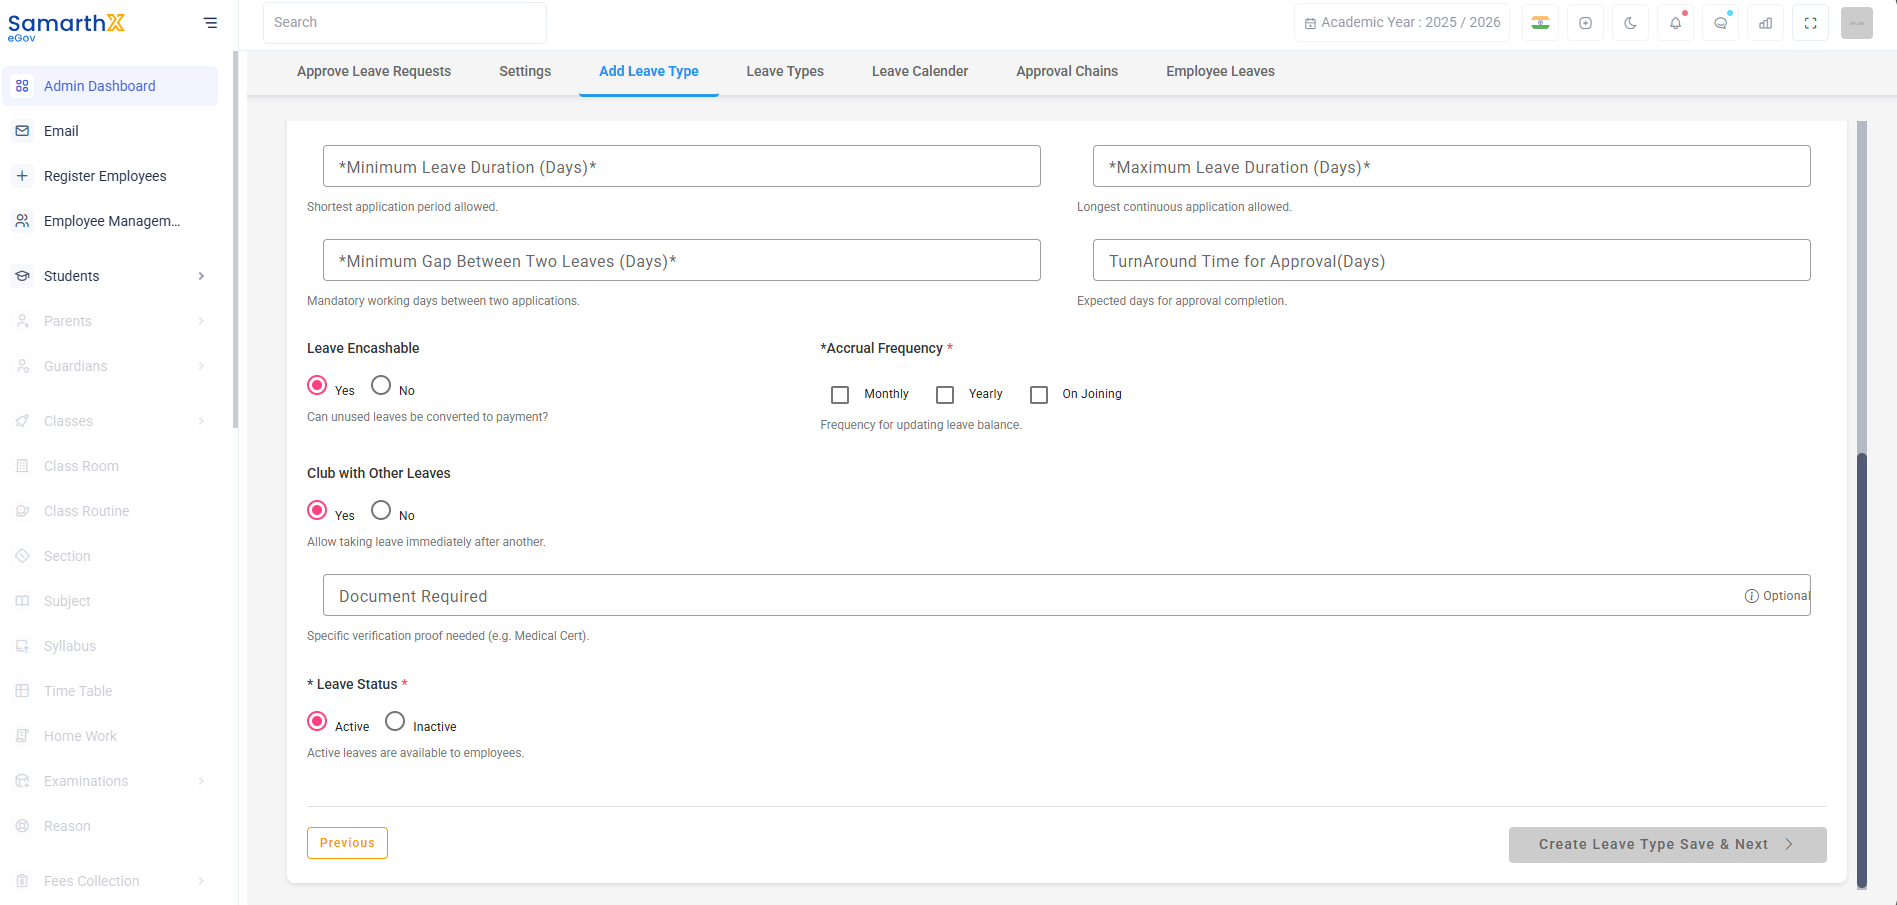
Used to create a new leave type for the school (for example: Casual Leave, Earned Leave, Compensatory Off, etc.). Newly added leave types become available to employees while applying for leave.
1.4 Leave Types
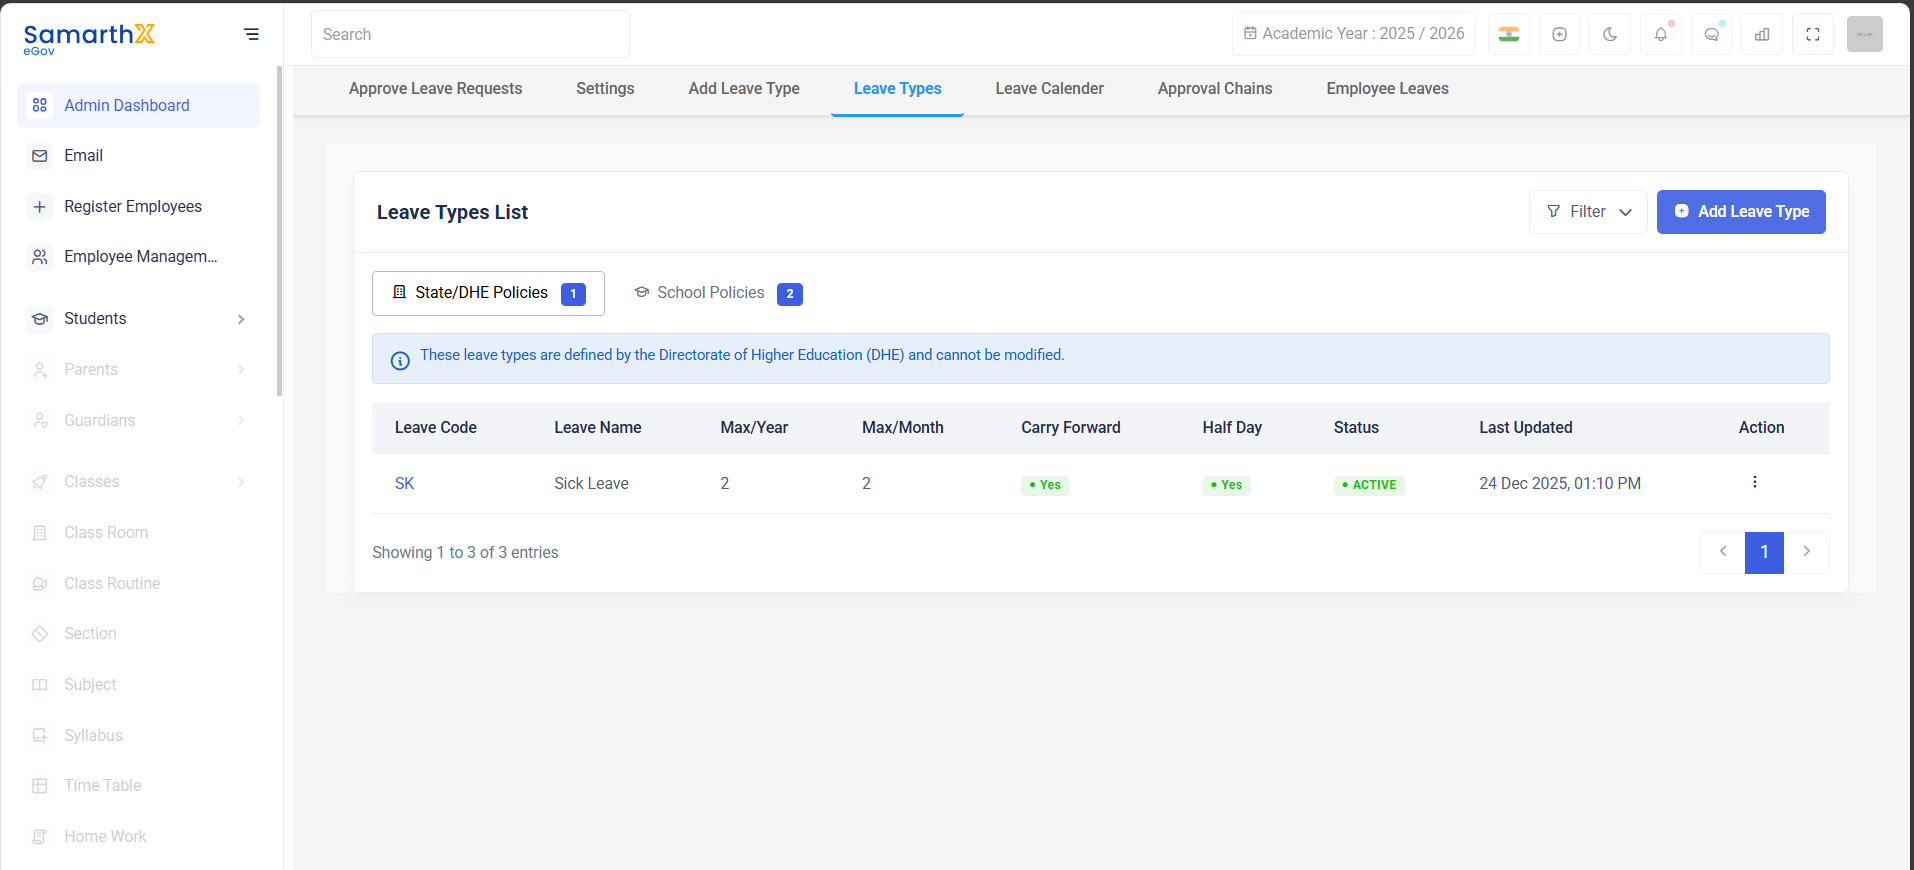
Displays all available leave types, including:
-
Leave types configured by the State/DHE
-
Leave types configured by the School
Schools can either:
-
Use State/DHE‑defined leave types, or
-
Create and manage their own leave types
1.5 Leave Calendar
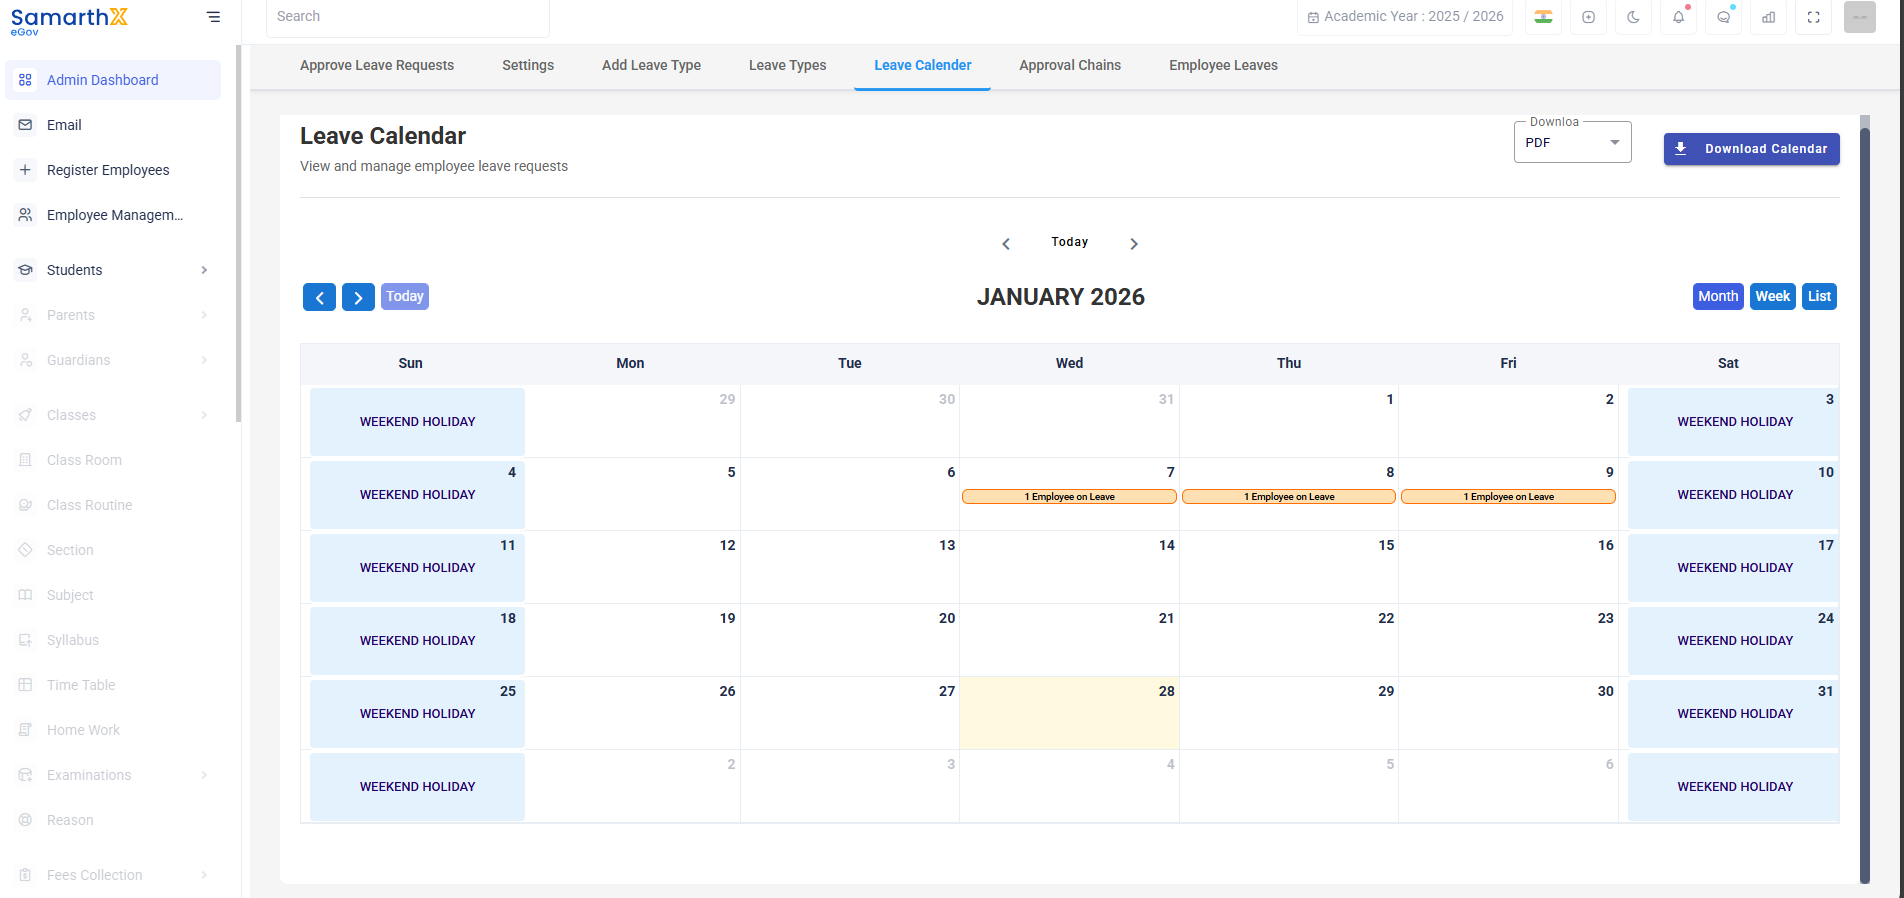
Provides a calendar view showing:
-
Employees who are on leave
-
Holidays declared by the State/DHE
-
Holidays declared by the School
This gives administrators a quick overview of workforce availability.
1.6 Approval Chains
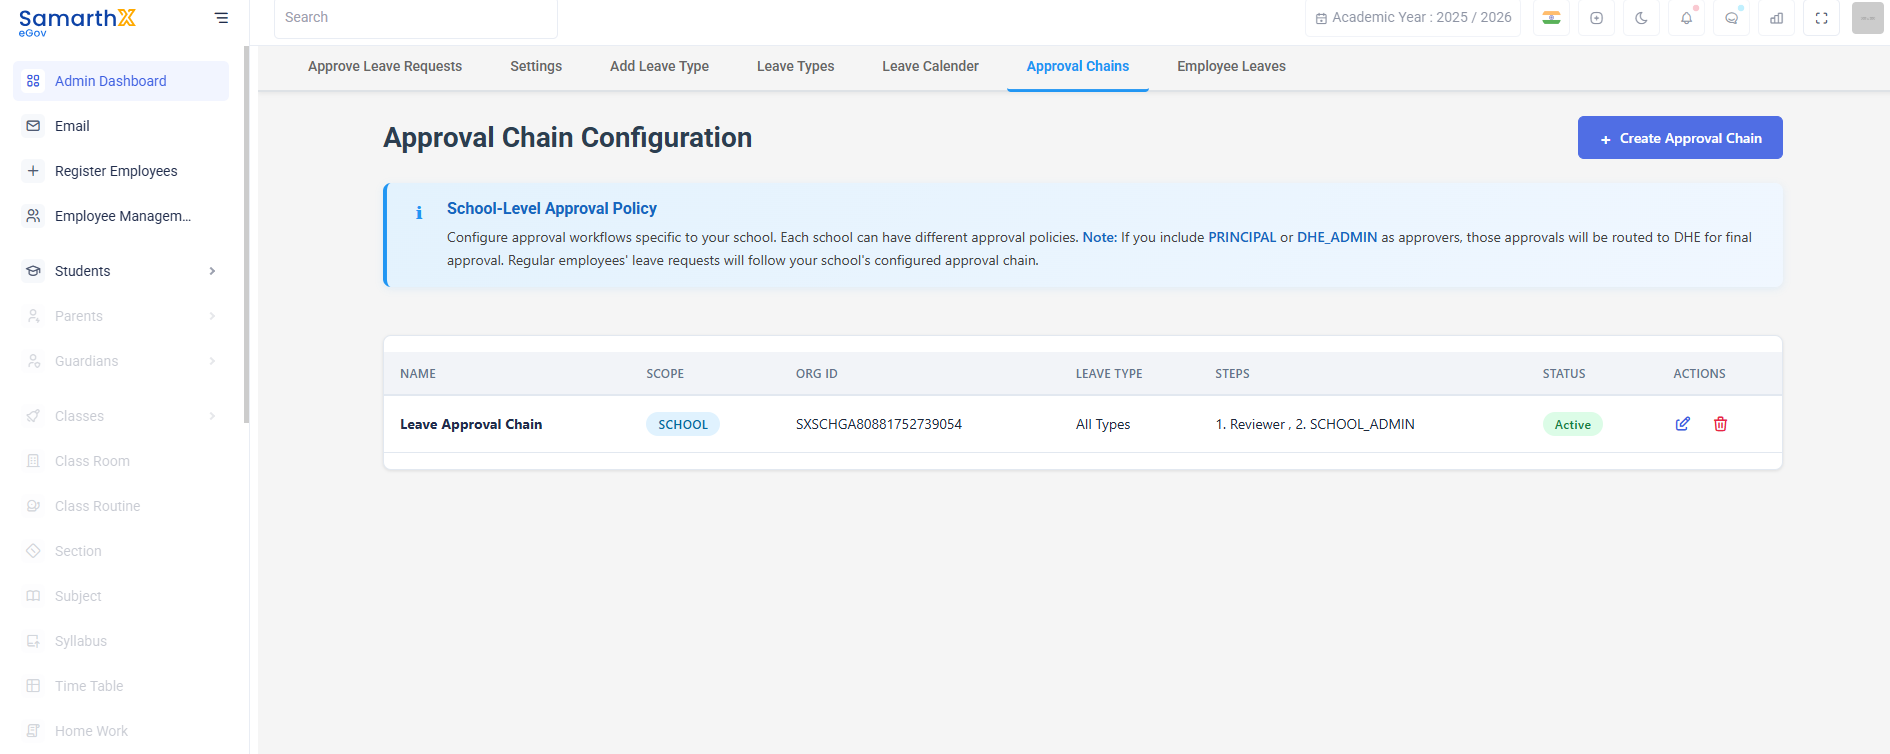
Used to define the approval workflow for leave requests. Schools can configure:
-
Who approves first
-
Multi‑level approvals (if required)
-
Role‑based approval processes
1.7 Employee Leaves
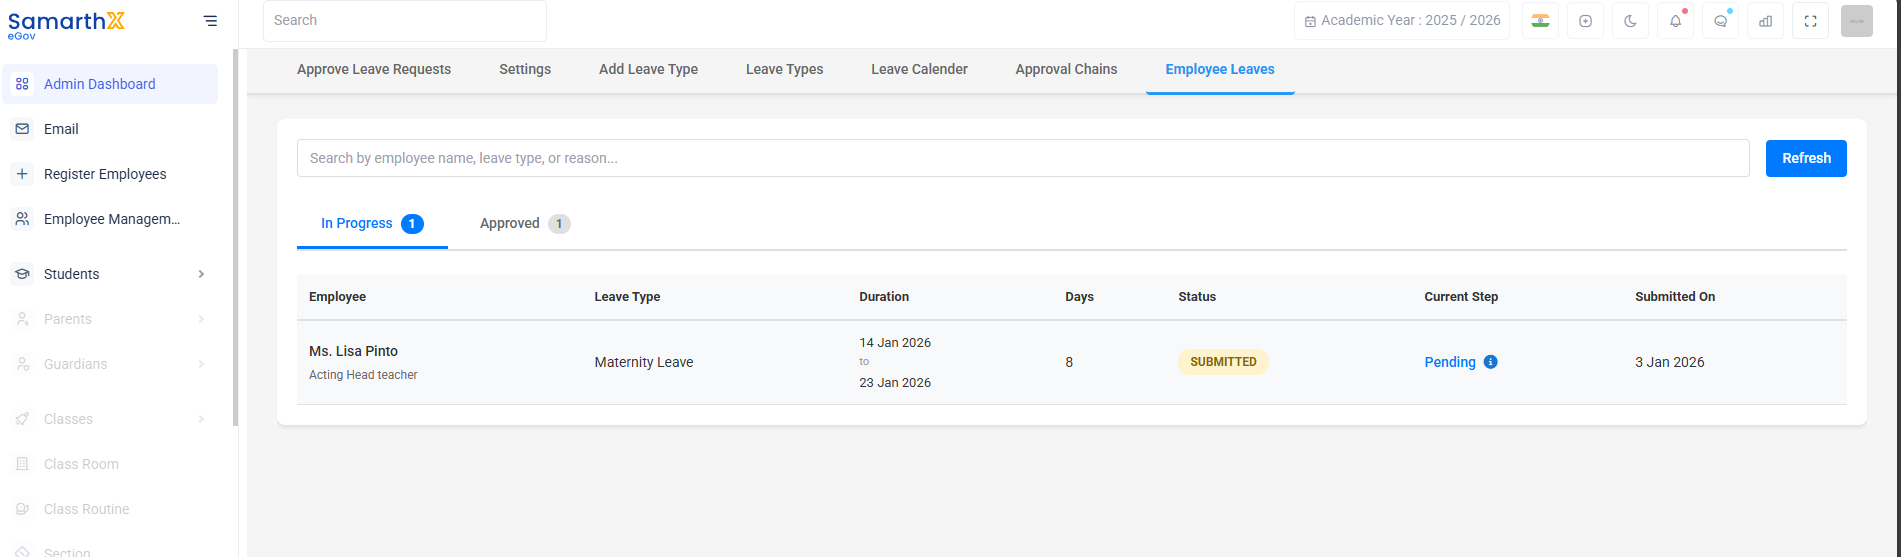
Shows the complete leave history of employees, including:
-
Approved leaves
-
Pending leave requests
-
Leave details such as dates, type, and status
2. Accessing Leave Types
You can manage leave types in either of the following ways:
-
Click on the Leave Types tab from the Leave module navigation, or
-
Click on Add Leave Type to directly create a new leave category
2.1 Leave Types List Section
This section displays all leave types currently available in the system.
Each leave type is shown with the following details:
-
Leave Code – Short identifier for the leave type
-
Leave Name – Name of the leave
-
Max/Year – Maximum leave allowed per year
-
Max/Month – Maximum leave allowed per month
-
Carry Forward – Indicates whether unused leave can be carried forward
-
Half Day – Indicates whether half‑day leave is allowed
-
Status – Shows whether the leave type is active or inactive
-
Last Updated – Date and time when the leave type was last modified
-
Action – Options to view or delete the leave type
2.2 Leave Type Categories
Leave types are grouped under two categories:
2.21 State/DHE Policies
-
These leave types are defined by the Directorate of Higher Education (DHE)
-
They are read‑only and cannot be modified or deleted by the school
-
Schools can use these leave types as‑is
2.22 School Policies
-
These leave types are created and managed by the school
-
Schools can add, view, or delete these leave types as required
2.3 Adding a New Leave Type
To create a new leave type:
-
Click on Add Leave Type (button or tab)
-
Fill in the required leave details such as:
-
Leave code and name
-
Maximum leave per year and per month
-
Carry forward and half‑day options
-
-
Save the leave type
Once created, the leave type will appear under School Policies.
2.4 Viewing or Deleting a Leave Type
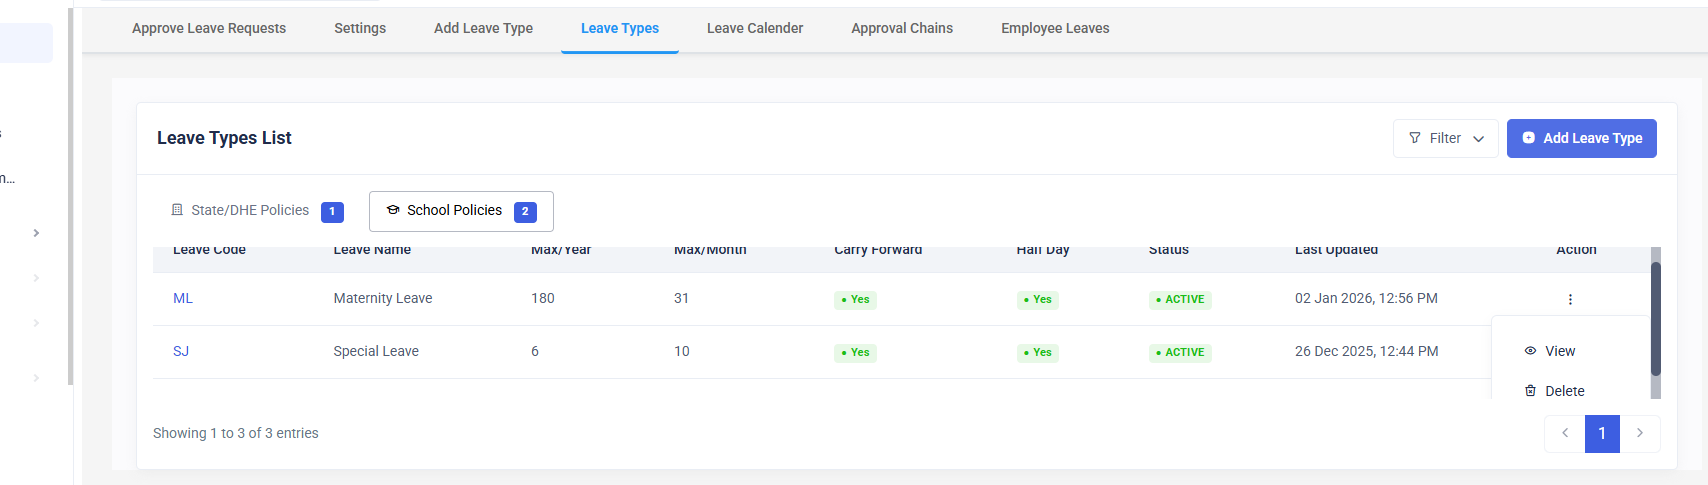
-
Click on the three‑dot menu under the Action column
-
Select View to see detailed information about the leave type
-
Select Delete to remove the leave type (applicable only for school‑defined leave types)
State/DHE leave types cannot be deleted or edited.
2.5 Configuring Leave Types – First‑Time Setup
When a school uses the Leave module for the first time:
-
Review the available State/DHE leave types
-
Decide whether to use them directly or create school‑specific leave types
-
Add new leave types if required using Add Leave Type
-
Configure approval workflows in Approval Chains
-
Set school holidays using Settings
2.6 Usage in Leave Approval Process
-
-
All active leave types are visible to employees when applying for leave
-
Leave balances are automatically calculated based on the configured rules
-
Leave approval and visibility follow the defined approval chain
-
3. Approval Chains
3.1 Overview
The Approval Chains section is used to define the workflow through which employee leave requests are reviewed and approved. It allows schools to configure a structured, role-based approval process to ensure that leave applications are processed in a consistent and authorized manner.
Approval chains determine who approves a leave request and in what order.
3.2 Purpose of Approval Chains
Approval Chains are used to:
-
Define the sequence of approvers for leave requests
-
Ensure accountability at each approval level
-
Align leave approvals with institutional hierarchy and policy
Once configured, all leave requests automatically follow the defined approval chain.
3.3 Accessing Approval Chains
To manage approval chains:
This section is accessible only to authorized administrative users.
3.4 Creating an Approval Chain
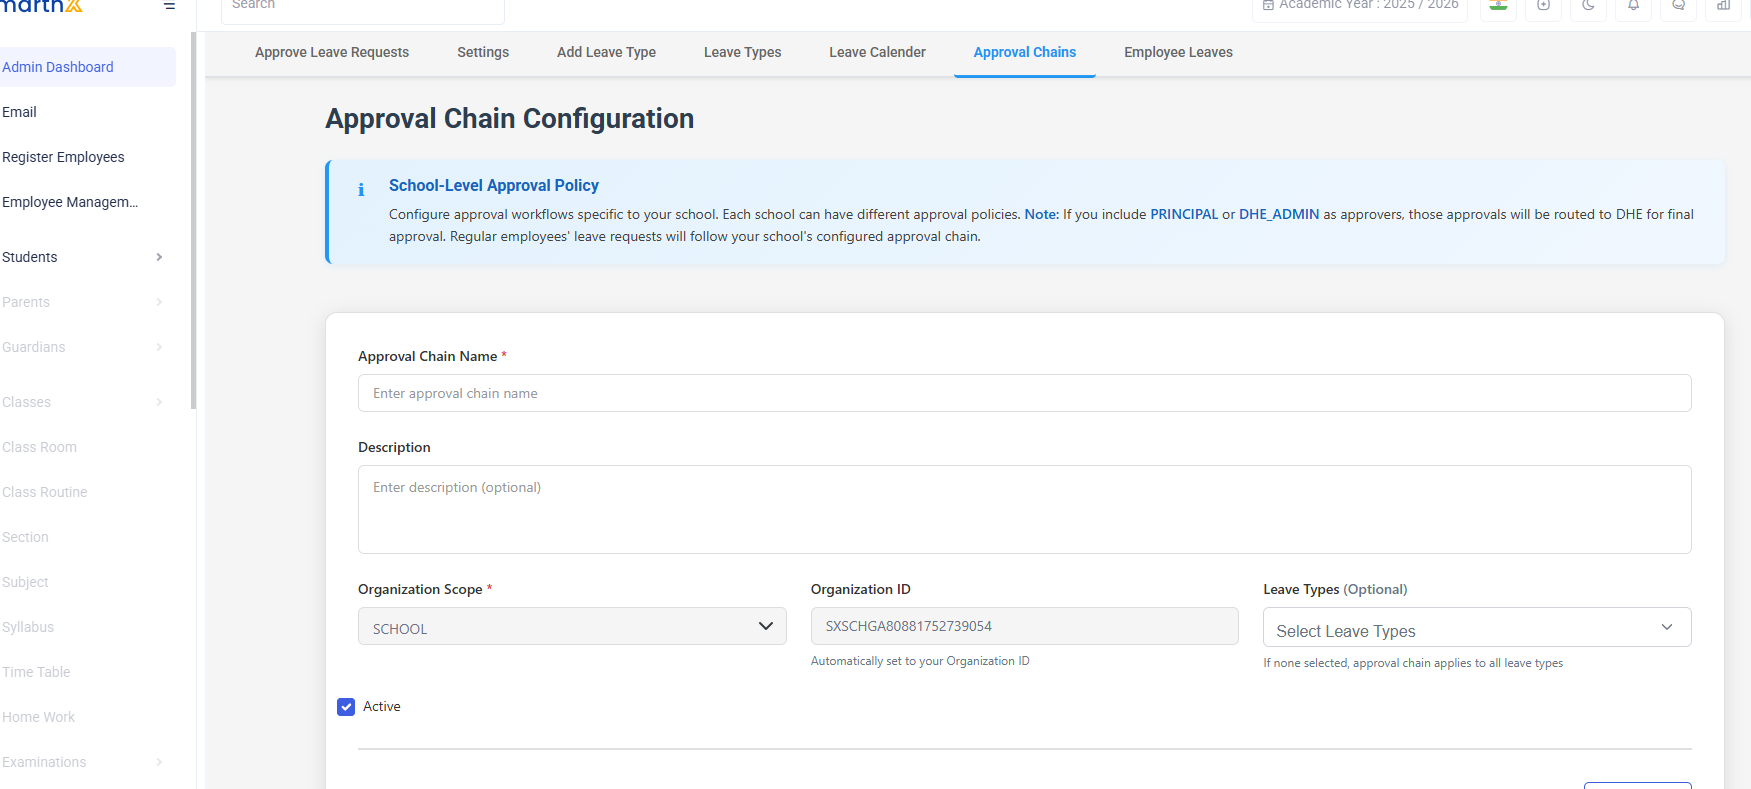
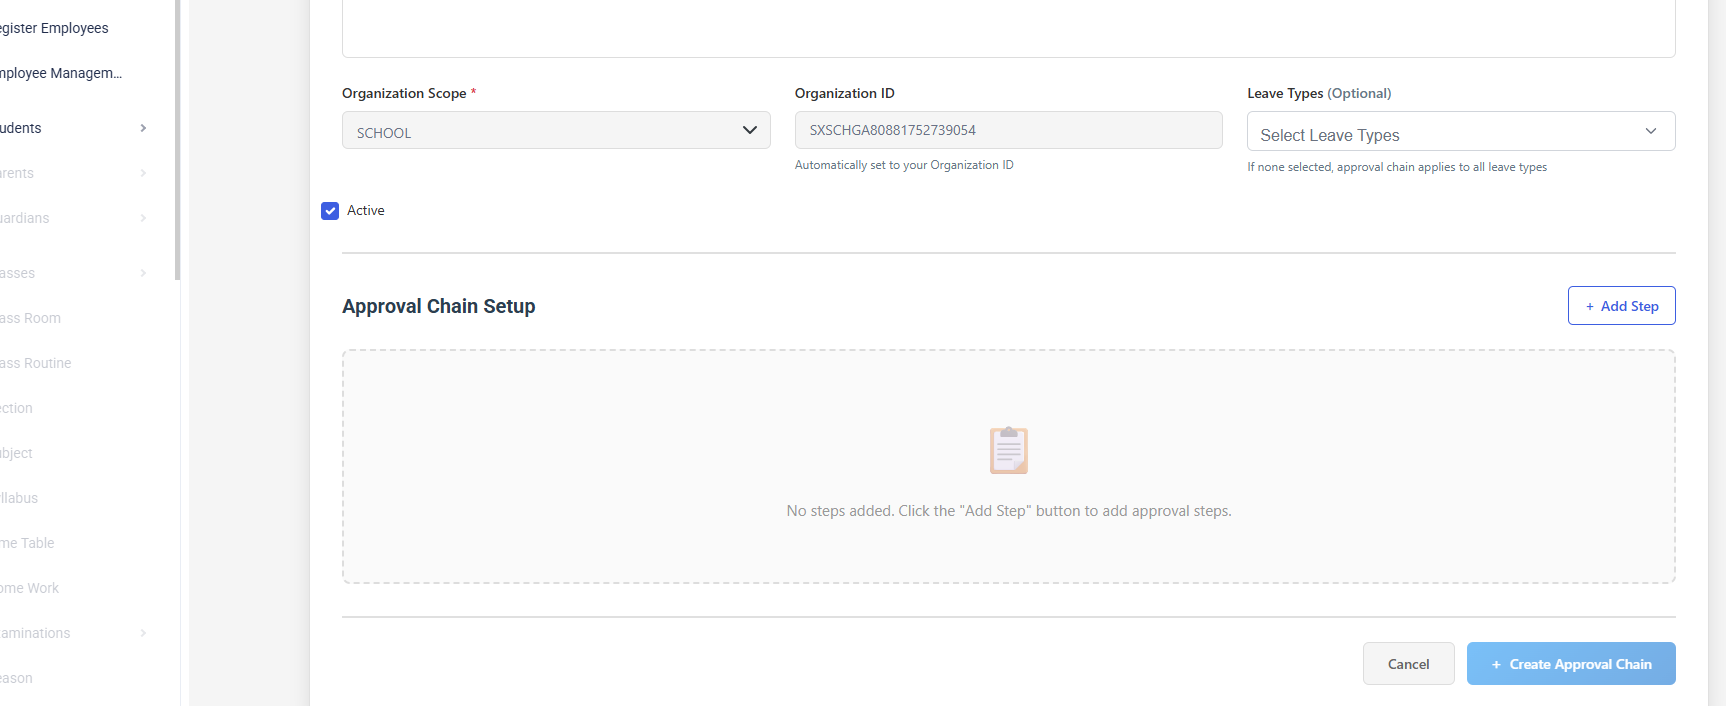
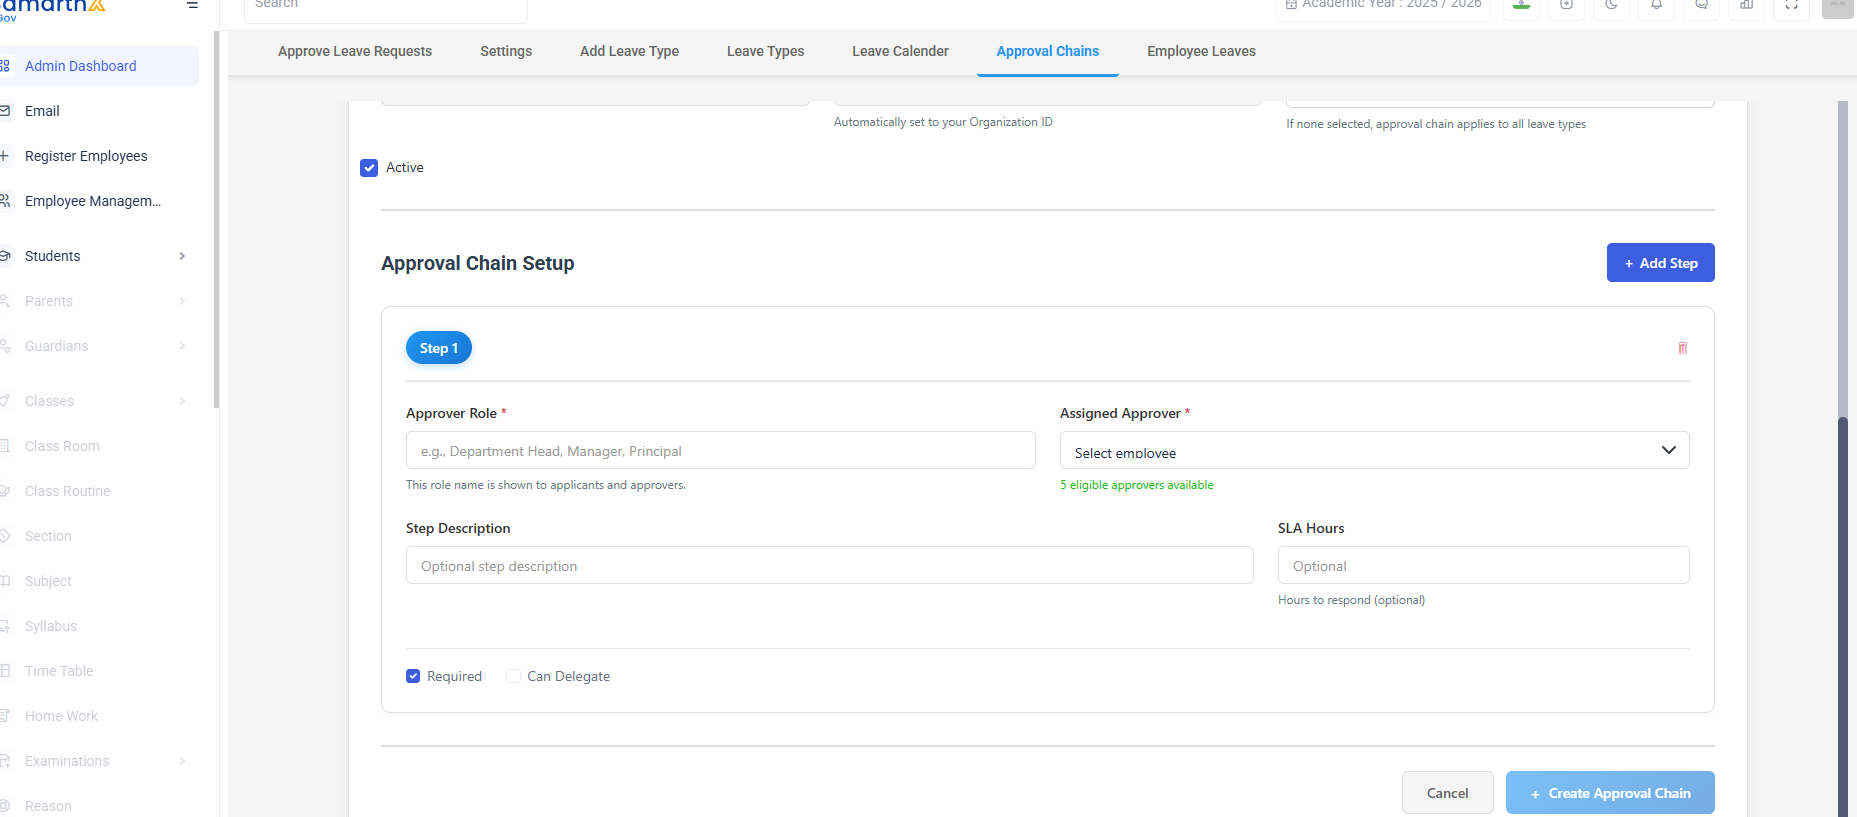
Note: While selecting an Assigned Approver, only employees who have been granted Leave Approval permission are displayed in the list. These employees have access to the Approve Leave Requests page and are authorized to take approval actions.
To create a new approval chain:
-
Click on Add Approval Chain
-
Enter a name for the approval chain
-
Define the approval levels by selecting:
-
Approver role or designation
-
Order of approval (Level 1, Level 2, etc.)
-
-
Save the approval chain
Each level represents a required approval step before the leave request is finalized.
3.5 Approval Flow Behavior
Once an approval chain is configured:
-
Leave requests are routed automatically to the first approver
-
After approval, the request moves to the next level, if defined
-
The leave is marked as approved only after all required levels approve
-
If a request is rejected at any level, the process stops and the leave is marked as rejected
3.6 Applying Approval Chains to Leave Requests
-
Approval chains are applied automatically based on system configuration
-
Employees are not required to select an approval chain while applying for leave
-
Approvers see pending requests in the Approve Leave Requests section
3.7 Managing Approval Chains
Administrators can:
-
View existing approval chains
-
Modify approval levels when policies change
-
Disable approval chains that are no longer required
Changes to approval chains apply to new leave requests only.
4. Approving Leave Requests
The Approve Leave Requests section allows authorized approvers to review, discuss, and take action on employee leave applications.
4.1 Viewing Leave Requests
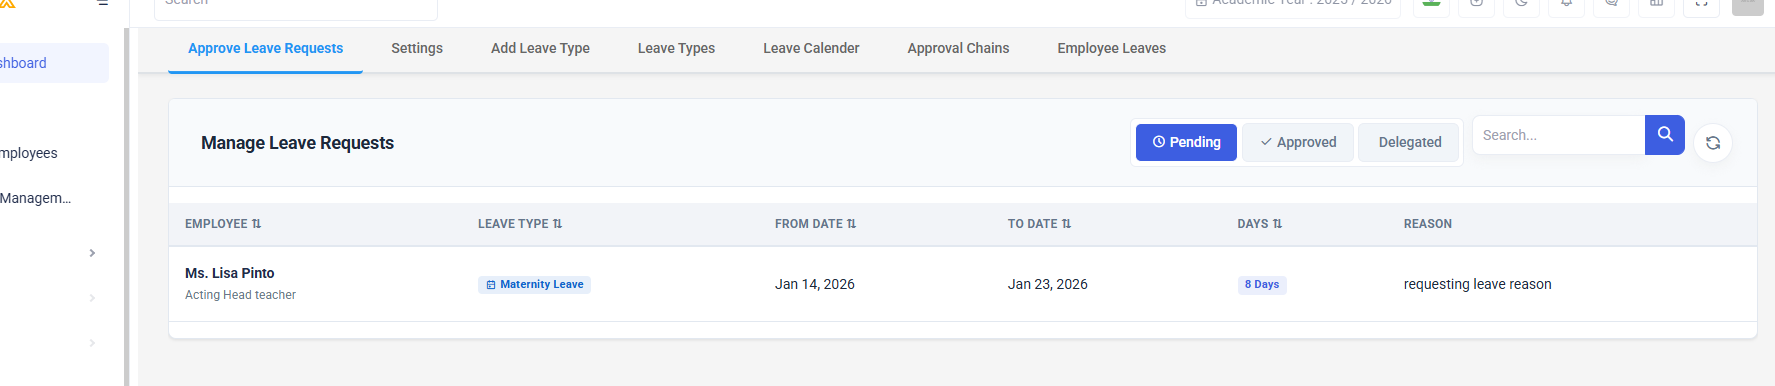
-
All leave requests pending approval are listed in a tabular view.
-
Approvers can filter requests by Pending, Approved, or Delegated status.
-
Each row displays key details such as employee name, leave type, duration, and requested dates.
4.2 Accessing Leave Request Details
-
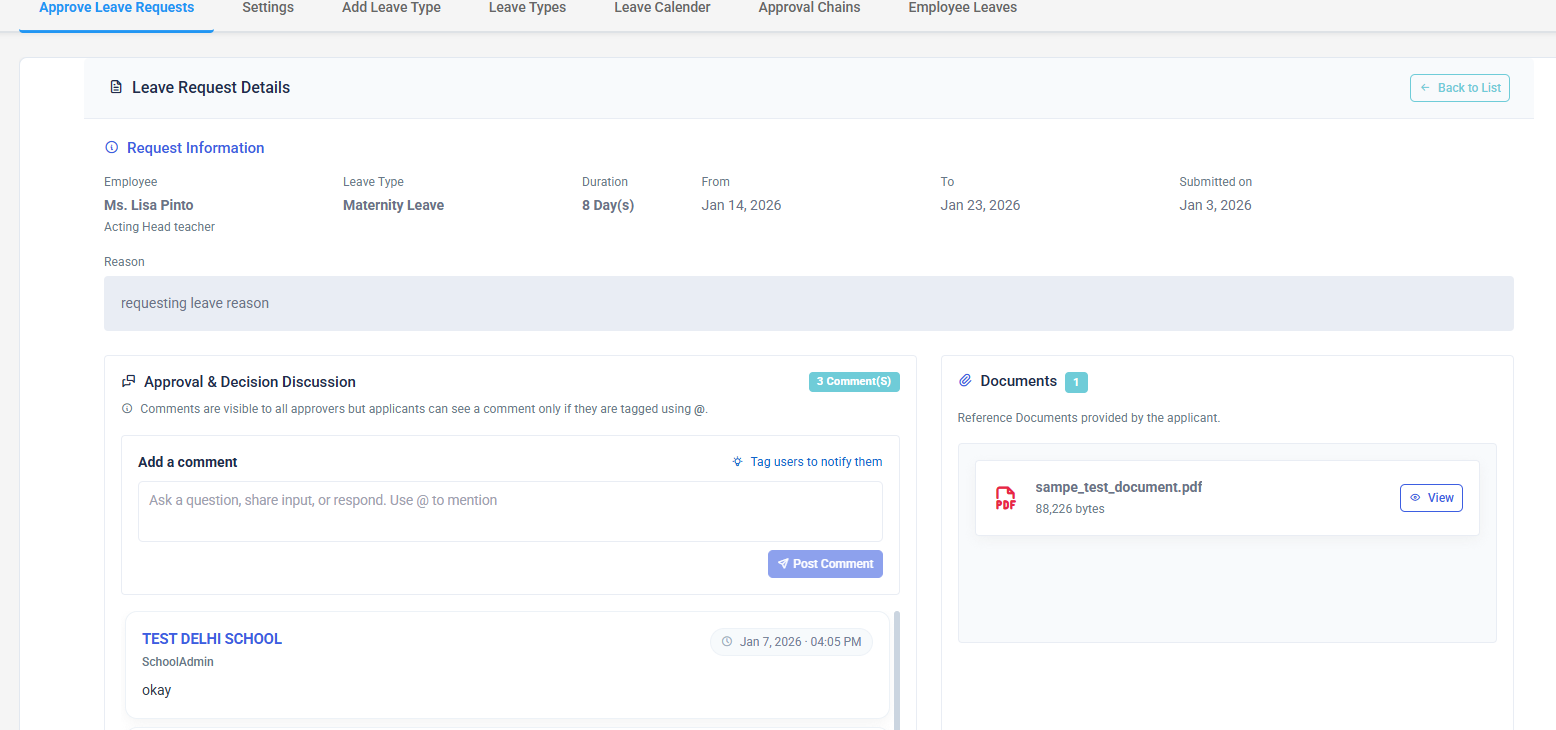
Clicking on a leave request row opens a detailed request page.
-
This page provides complete information including:
-
Employee details
-
Leave type and duration
-
From and To dates
-
Reason for leave
-
Submission date
-
4.3 Approval & Decision Discussion
-
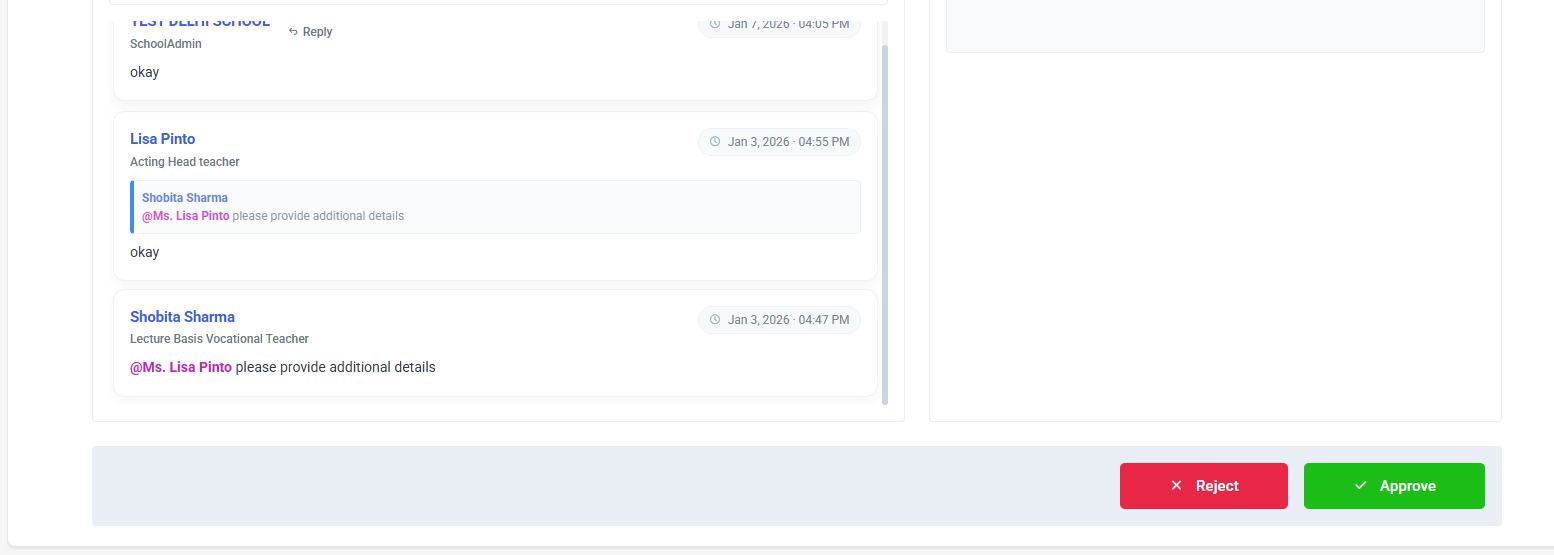
A Discussion section is available for approvers to collaborate before making a decision.
-
Approvers can add comments, ask questions, or request clarifications.
-
Comments are visible to all approvers.
-
Applicants can view comments only if they are tagged using
@.
4.4 Reference Documents
-
Any supporting documents uploaded by the employee are displayed in the Documents section.
-
Approvers can view these documents directly from the leave request details page.
4.5 Taking Action
-
Approvers can Approve or Reject the leave request using the action buttons provided at the bottom of the page.
-
The decision follows the configured approval chain and updates the request status accordingly.
No comments to display
No comments to display