
Student Management
Overview
This guide explains how School Administrators can manage students in the SamarthX School Portal and how students can complete their first-time login.
Accessing Student Management
-
Log in to the SamarthX School Dashboard.
-
From the left sidebar, click Student List.
-
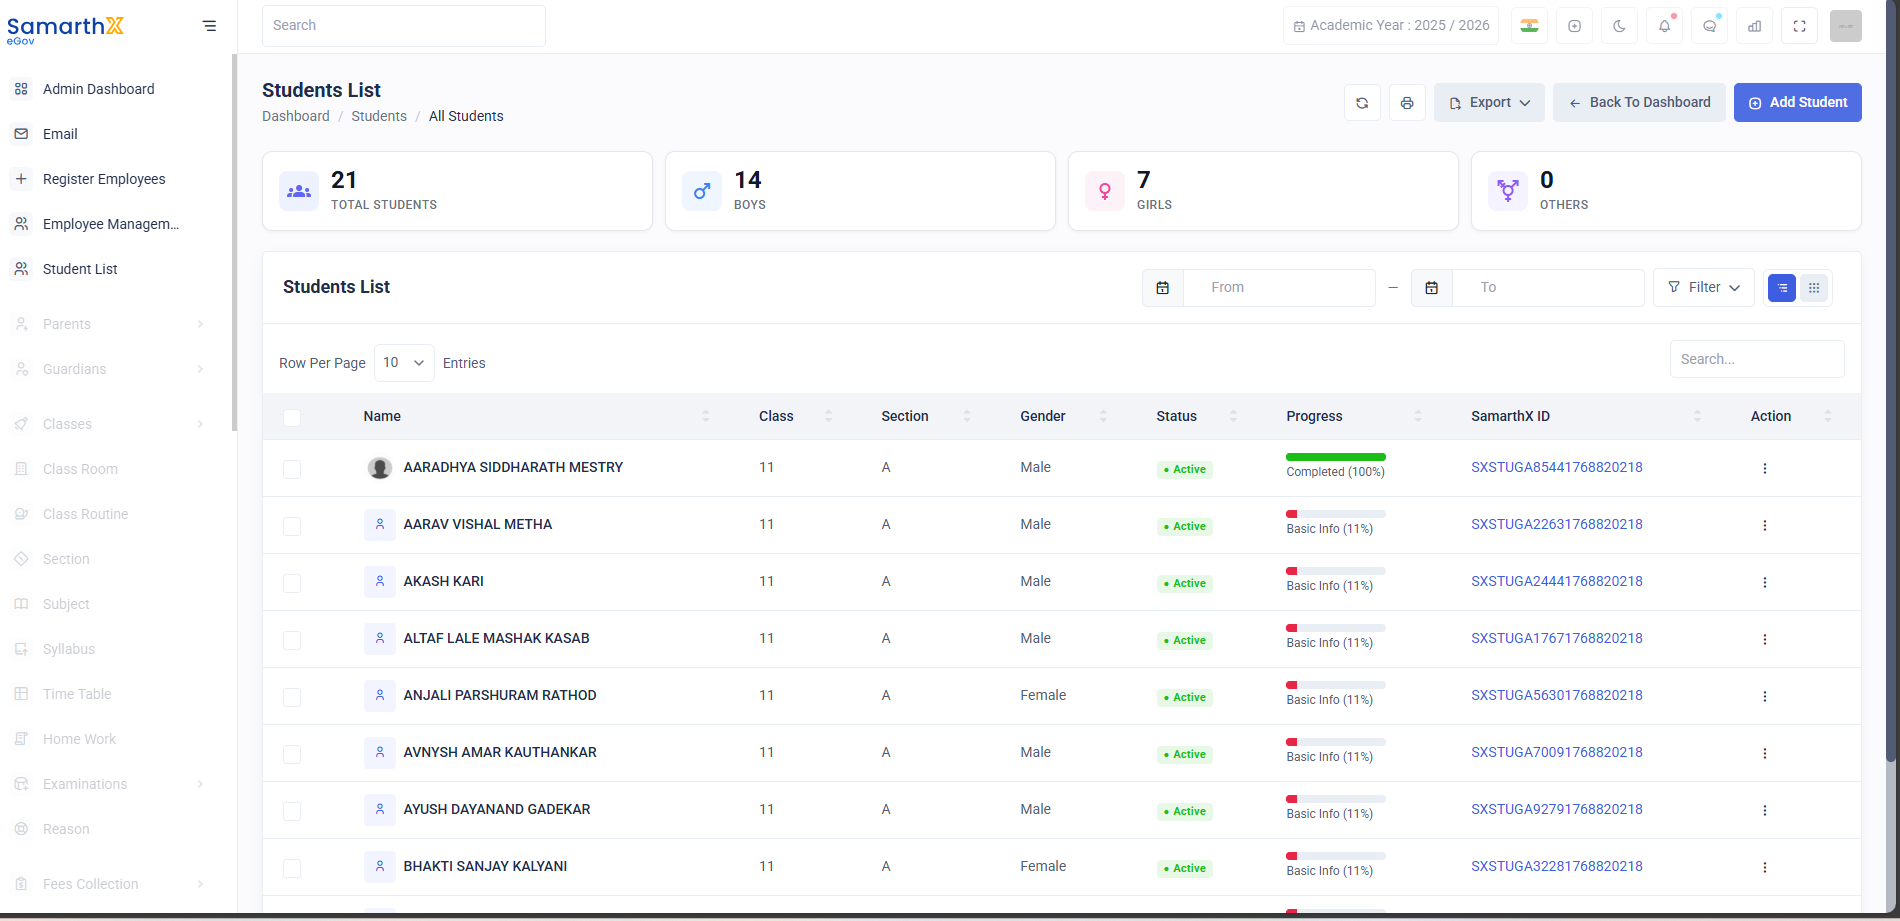
The Students List page displays all registered students along with:
-
Class and Section
-
Gender
-
Status (Active)
-
Profile completion progress
-
SamarthX ID
-
Adding New Students (Bulk Registration)
Students are added using the bulk upload feature.
Steps to Add Students:
-
On the Students List page, click Add Student.
-
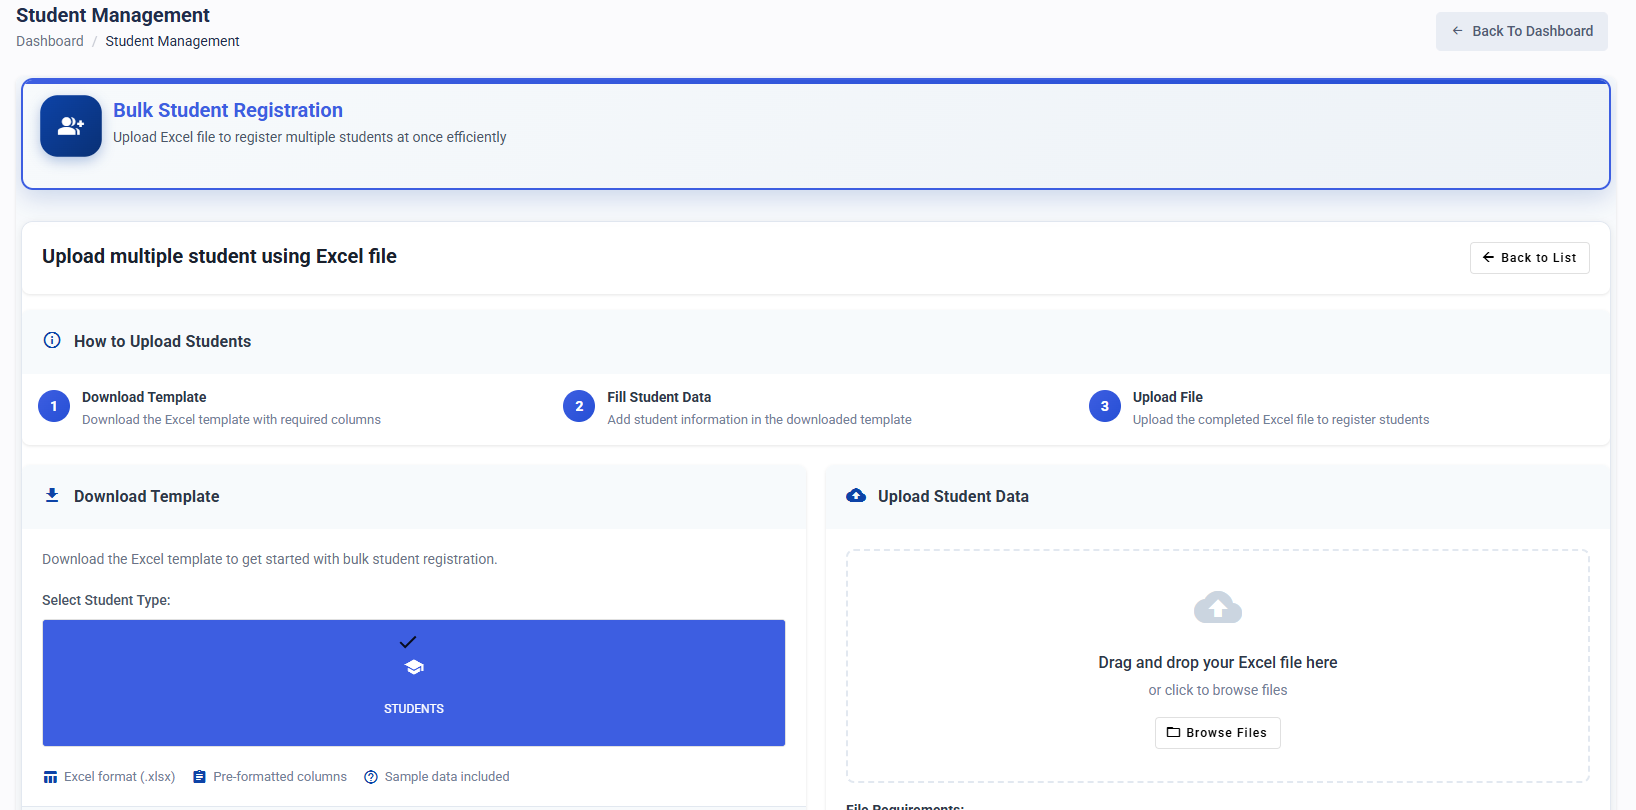
You will be redirected to Student Management – Bulk Student Registration.
-
Click Download Template to download the Excel file.
-
Open the downloaded Excel template and fill in all required student details.
-
Ensure the data is entered in the same format as provided in the template.
-
Save the completed Excel file.
Uploading Student Data
-
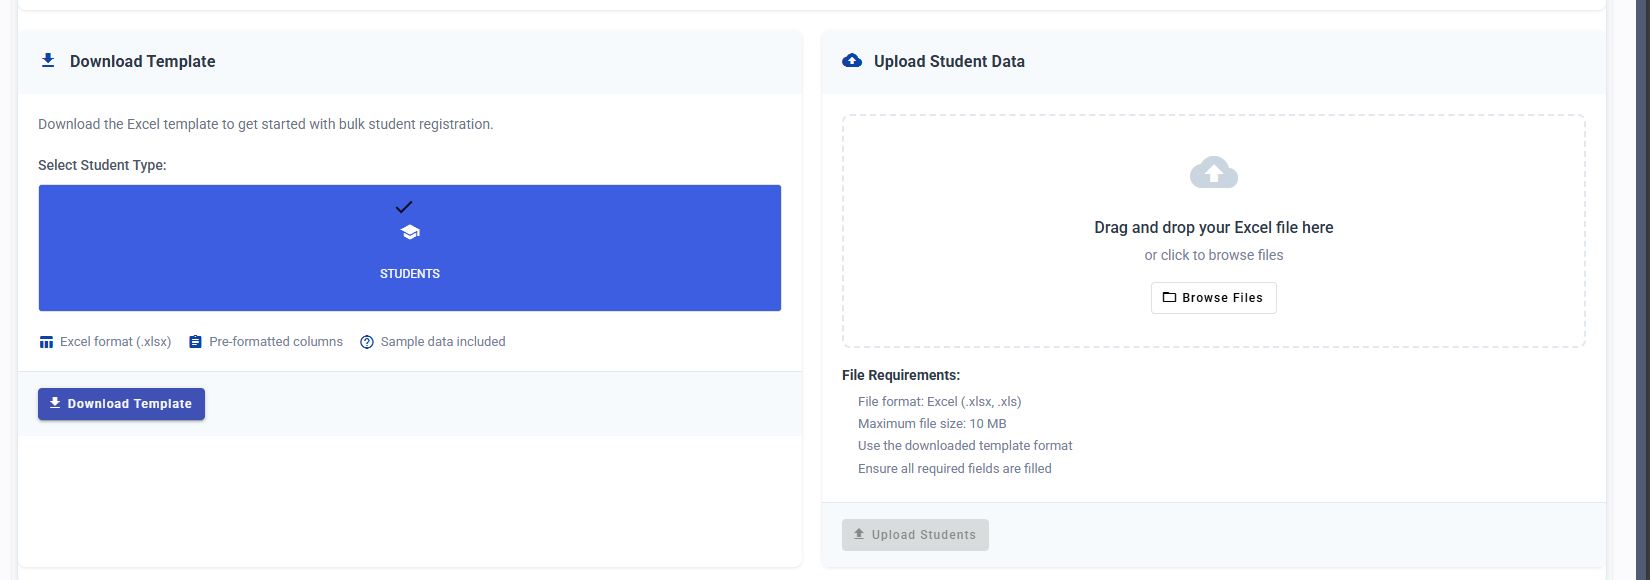
In the Upload Student Data section:
-
Drag and drop the completed Excel file, or
-
Click Browse Files to select the file from your system.
-
-
Click Upload Students.
-
Wait for the upload process to complete successfully.
File Requirements:
-
File format:
.xlsxor.xls -
Maximum file size: 10 MB
-
All mandatory fields must be filled
Verifying Student Registration
-
After upload, return to the Students List.
-
Verify that all students appear in the list.
-
Check student details such as class, section, and status to ensure correctness.
Student Login Setup (First-Time Login)
Once students are registered by the school, they must set up their login credentials.
Student Steps:
-
Open the SamarthX Student Portal.
-
Click Create Login Account.
-
Enter the following details:
-
Student PEN Number
-
Date of Birth (as per school records)
-
-
Verify using OTP sent to the registered mobile/email.
-
Set and confirm the password.
-
Login using the registered email/mobile number and password.
Important Notes
-
Ensure student data uploaded by Excel is accurate to avoid login issues.
-
PEN Number and Date of Birth must match school records for successful login setup.
-
Students will not be able to log in until their registration is completed by the school.
No comments to display
No comments to display